
Enrollment Reporting: Your Guide to Tracking
Learner Progress
Welcome to the reporting dashboard! Understanding who is enrolled, where they are in their training, and what organizational segments they belong to is essential for measuring the success of your learning programs. The Enrollment History report is your command center for this data, offering robust filtering and export tools.
Here is a simple, step-by-step guide on how to navigate, refine, and export your enrollment data.
Step 1: Accessing the Enrollment History Dashboard
All reporting functions related to learner assignments are found under the Enrollment menu in your Admin Dashboard.
1. Navigate to the Admin Dashboard sidebar.
2. Expand the Enrollment section.
3. Click on History.
This takes you directly to the Enrollment History dashboard.
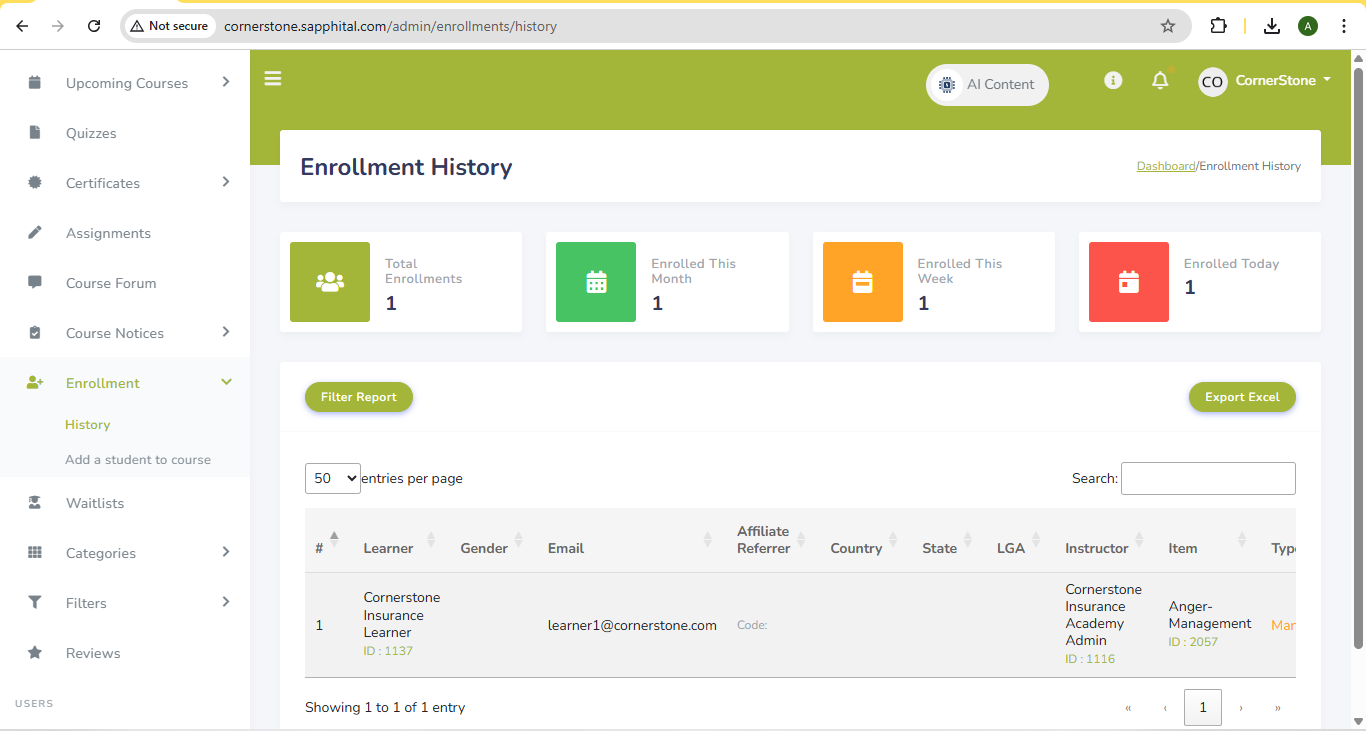
Step 2: Reviewing Real-Time Metrics
Upon landing on the page, you are immediately greeted by real-time summary statistics, providing a helpful snapshot of current activity:
Total Enrollments: The comprehensive count of all enrollment records in the system.
Enrolled This Month, This Week, and Today: Immediate counters that help you monitor administrative activity and learner uptake.
Below these quick metrics, the table displays the default list of all current enrollments, showing key details like the Learner's name, the Instructor, and the Item (Course Name) they are enrolled in.
Step 3: Filtering for Targeted Insights
To perform effective administrative auditing or analyze specific groups, you must refine the data displayed. Filtering allows you to find specific enrollment patterns without having to handle the entire dataset.
Click the Filter Report button. This opens an extensive dialogue box.
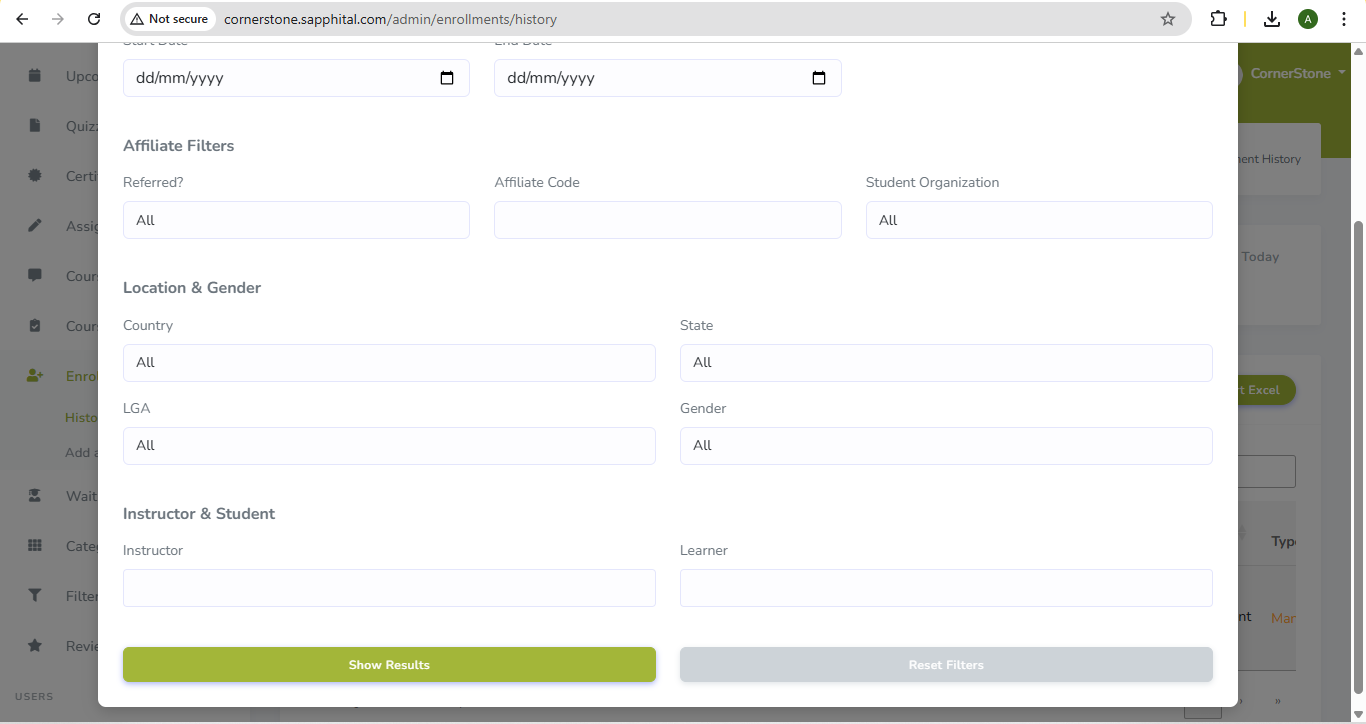
Apply the necessary filters:
Date Range: Select a specific enrollment period using the dd/mm/yyyy fields.
Location & Gender: Filter by geographical fields like Country, State, and LGA, as well as Gender.
Instructor & Student: Narrow the report to enrollments assigned by a specific Instructor or involving a specific Learner.
Affiliate Filters: Filter results based on referral status or specific Affiliate Code and Student Organization.
Once all required criteria are set, click Show Results at the bottom of the dialogue to apply the filters and update the main table.
Step 4: Exporting the Customized Report
After filtering the data to contain only the records you need, you can export a clean CSV file for analysis in any spreadsheet program.
Click the Export Excel button.
This opens the Select Fields to Export dialogue.
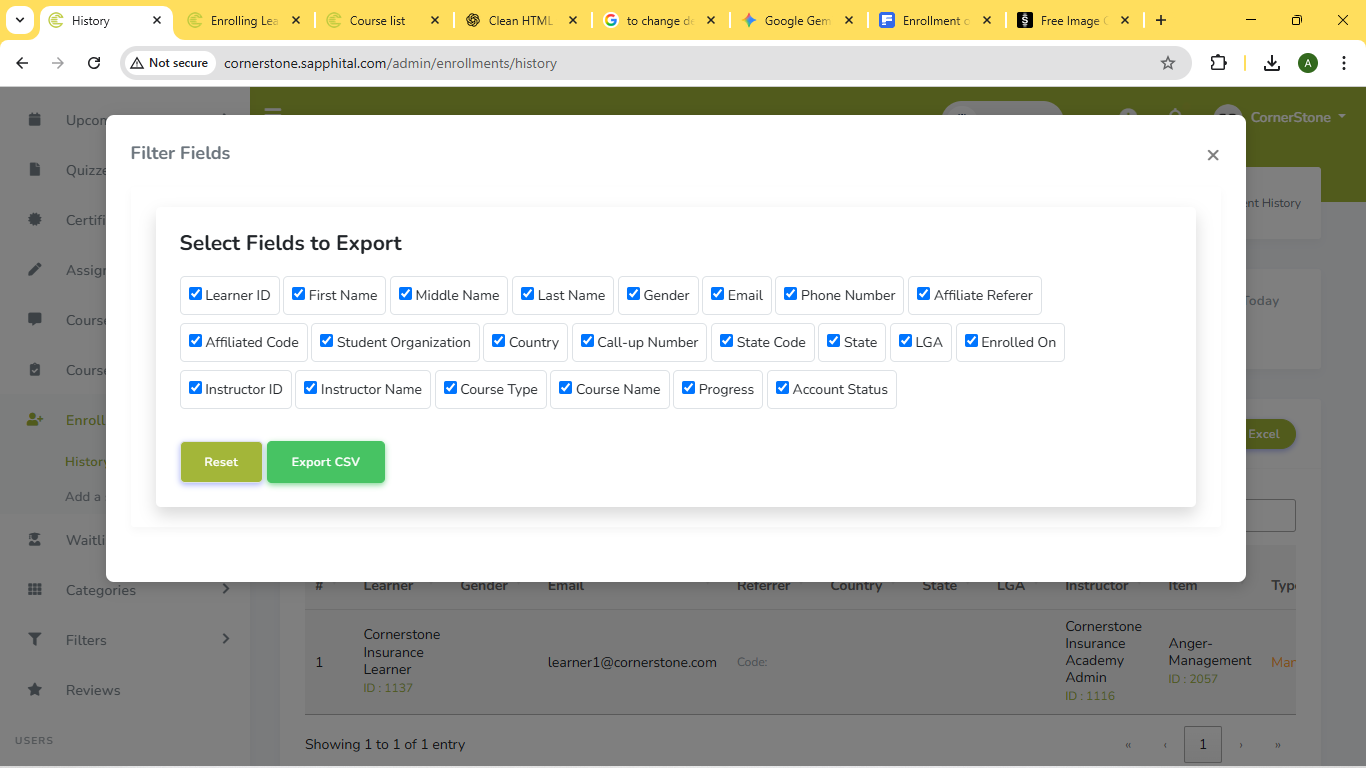
Select Your Fields: The system allows you to choose exactly what data columns you need.
Review the checklist and select or deselect fields based on your analysis requirements. Fields include Learner ID, Email, Progress, Course Name, and Account Status.
Tip: Only selecting the necessary fields keeps your exported file clean and manageable.
Click the Export CSV button at the bottom of the dialogue.
The system will then generate and download the CSV file containing all the enrollment records that matched your filters and included your selected fields, giving you a complete and auditable history of your learning programs.
Comments (0)

Categories
Recent posts
.jpg)
Customizing Colors and Logo
5 Nov 2025.jpg)
Using the Noticeboard and Notifications
6 Nov 2025
Enrolling Learners in the LMS
6 Nov 2025.jpg)