
Your Quick Guide to Enrolling Learners in the LMS
Hello, fellow administrator! Getting your learners into the right courses is the most important step in any training program. Our LMS offers two great options for managing enrollment, depending on how many people you need to enroll: the quick-and-easy Single Enrollment, and the powerful Bulk Enrollment tool.
Let’s dive into a simple, step-by-step tutorial for both methods!
Section 1: Choosing Your Enrollment Path
The first decision is simple: Are you enrolling one or two people? Use Single Enrollment. Are you enrolling hundreds? You'll need the Bulk method.
Section 2: Method 1 – Single User Enrollment (The Quick Add)
This is the perfect way to handle daily, low-volume enrollment requests. You get instant confirmation, and it relies entirely on searching by name.
2.1 Accessing the Enrollment Page
Start from your Admin Dashboard.
Navigate to the Enrollment section on the left sidebar, and then select Add a student to course.
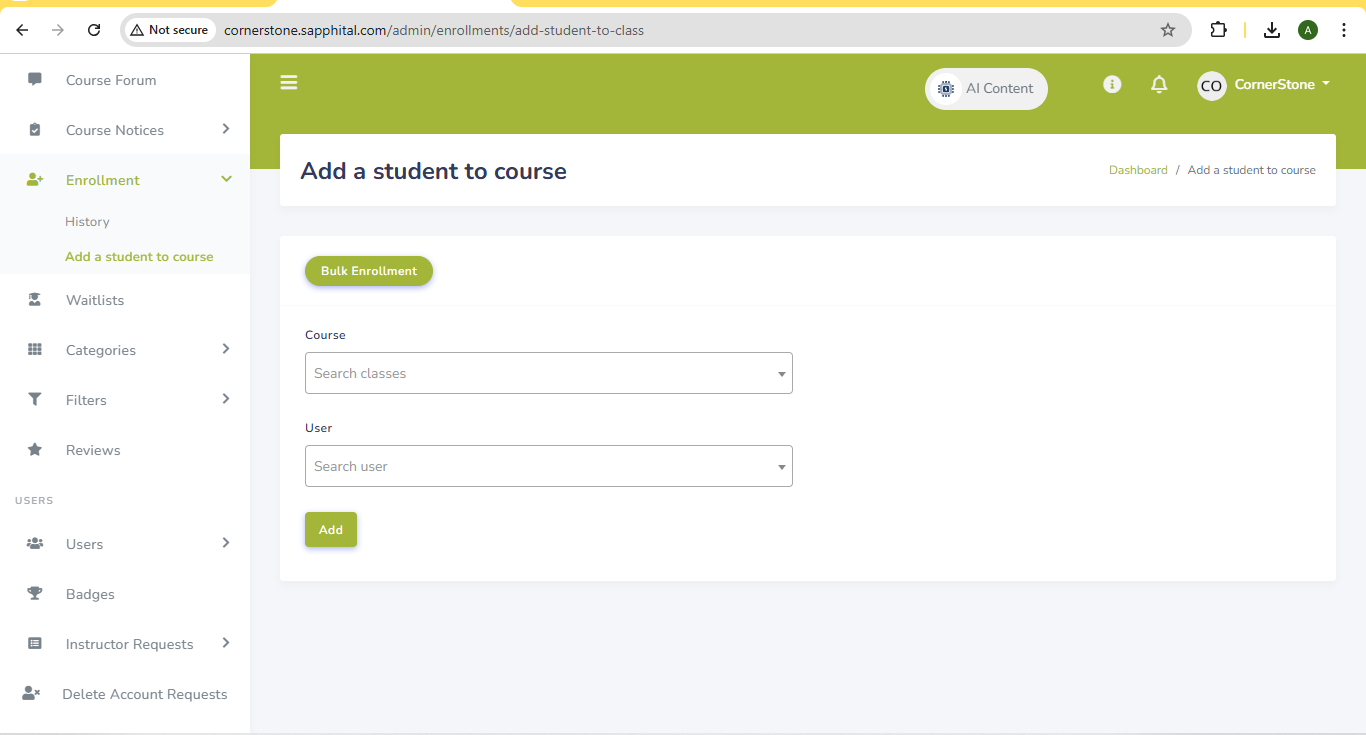
2.2 Selecting the Course and User
1. Select the Course: Use the 'Search classes' dropdown under the Course field. Begin typing the name of the course (e.g., "Anger Management") until it appears, and click to select it.
2. Select the User: Use the 'Search user' dropdown under the User field.
Start typing the learner's name (e.g., "Cornerstone Insurance Learner") and select the correct person.
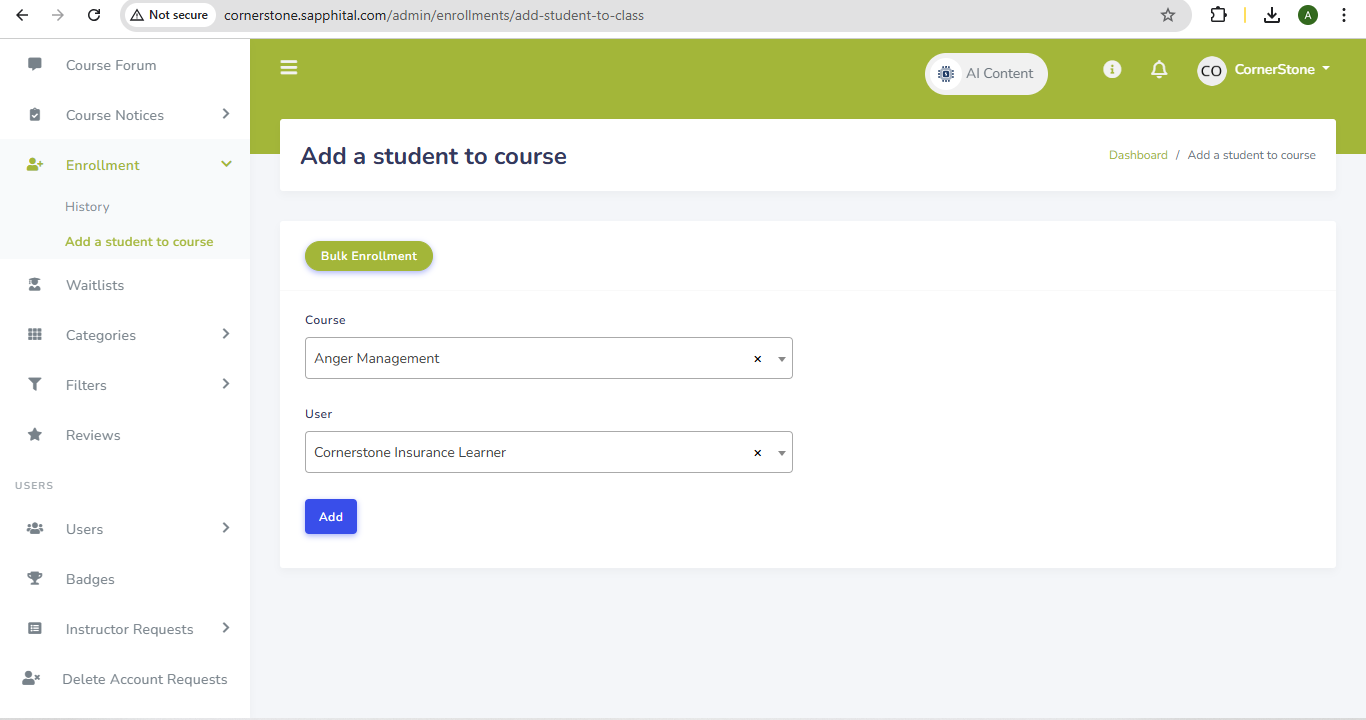
2.3 Finalizing the Enrollment
Once both fields are populated and correct, simply click the Add button. The system confirms the enrollment immediately, and your learner gains access right away!
Section 3: Method 2 – Bulk Enrollment: The Power of Scale
Bulk Enrollment is designed for efficiency and speed when managing large groups. Since the system processes these jobs in the background (asynchronously), we rely on precise data files to load the information.
3.1 Step 1: Locating the Unique Course IDs
The bulk tool requires the unique, numerical ID for each course, not the title. This is the single most critical piece of data you need to gather.
1. Navigate to the main course listing in the Admin Dashboard, typically under Education > Courses.
2. Locate the column labeled ID. You must use these numbers (e.g., 2057, 2050, 2046) in your bulk file
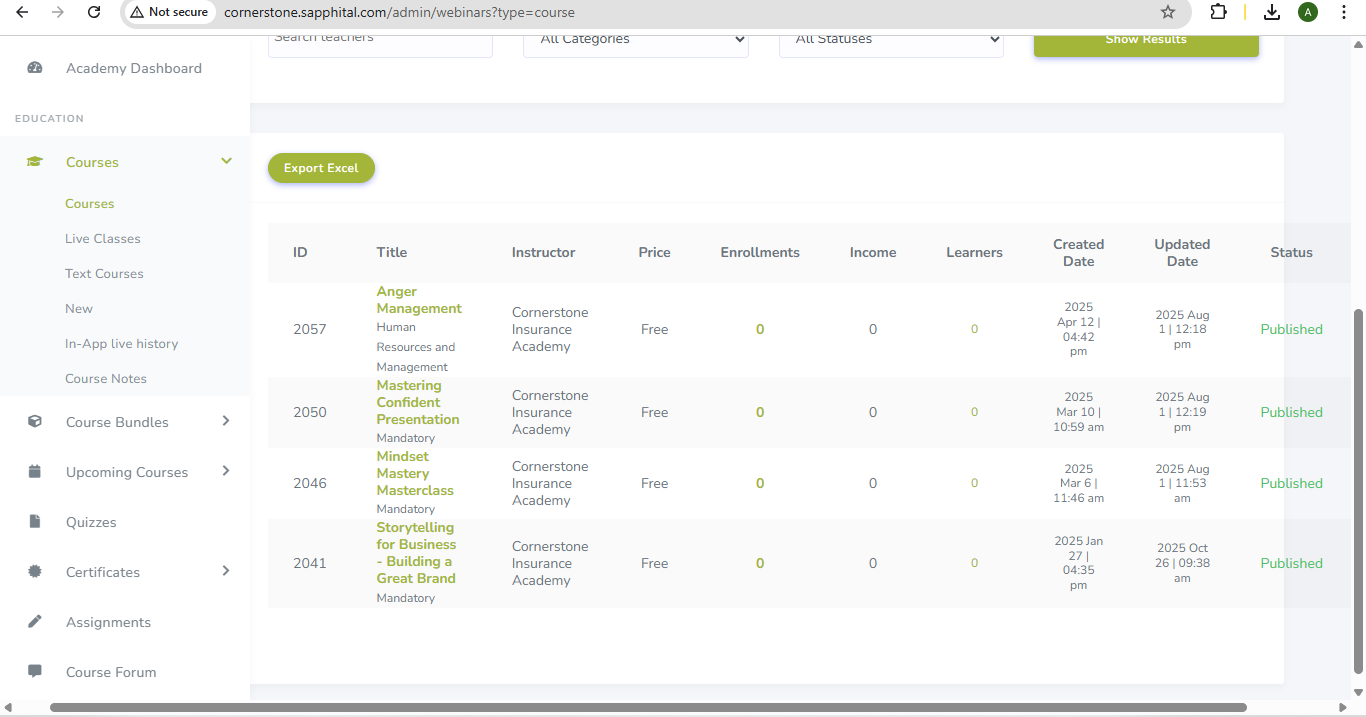
3.2 Step 2: Accessing the Bulk Tool and Template
1. Return to the Add a student to course page.
2. Click the Bulk Enrollment button. A new 'Upload Bulk Data' dialogue box will appear.
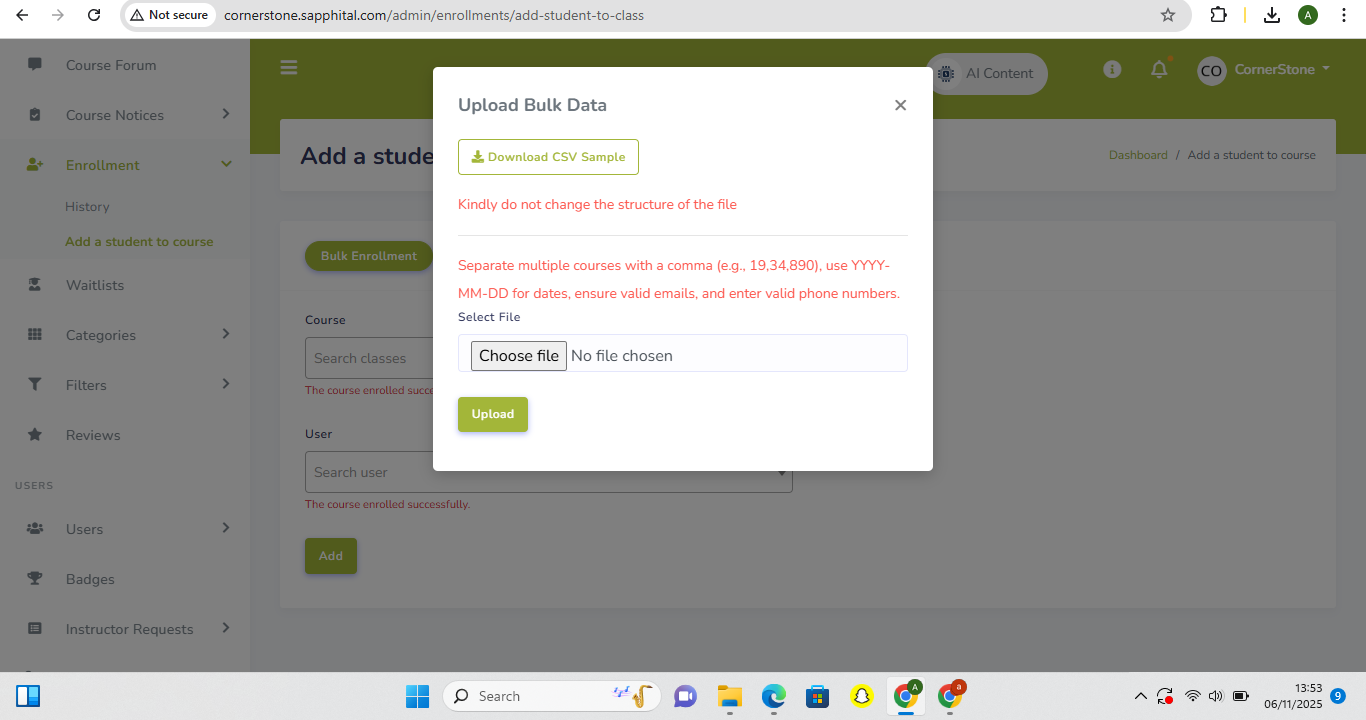
3. Click Download CSV Sample to get the exact file structure you need. The system warns us not to change the structure of this file—its integrity is key to a successful upload.
3.3 Step 3: Preparing the CSV File
Your bulk file must follow a strict format. Remember, it's all about planning! Each row represents a user, and all data within that row must be perfectly matched using commas.
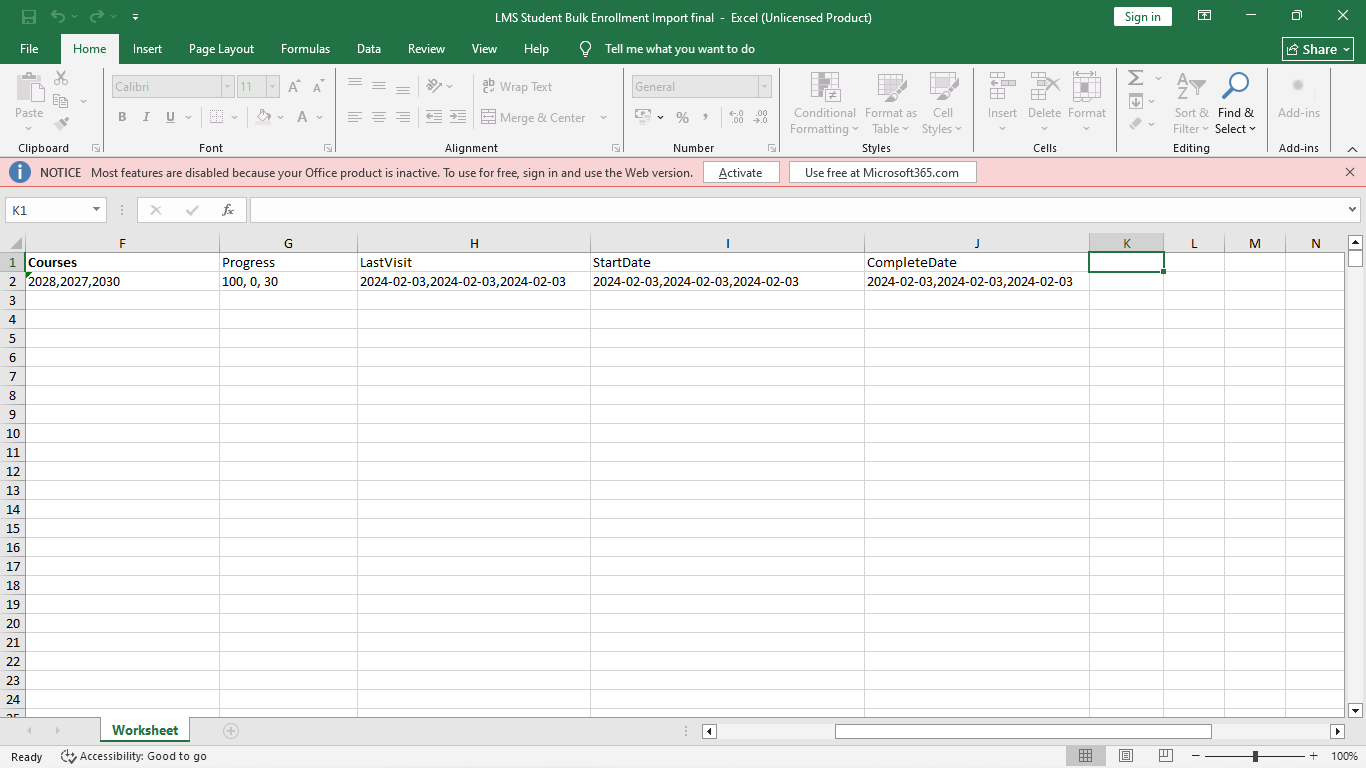
4). Use comma separators to match the number of Course IDs.
1. Save your file as a CSV (Comma Separated Values) file.
2. In the Upload Dialogue , click Choose file, select your prepared CSV, and then click Upload.
3.4 Step 4: Uploading and Monitoring
Expect a Delay: Unlike single enrollment, bulk loads are processed in a queue.
This organized approach ensures your data is clean, and your bulk enrollment job runs smoothly, allowing you to manage large-scale training programs effortlessly!
Comments (0)

Categories
Recent posts
.jpg)
Customizing Colors and Logo
5 Nov 2025.jpg)
Using the Noticeboard and Notifications
6 Nov 2025
Enrolling Learners in the LMS
6 Nov 2025.jpg)