.jpg)
Adding Certificates to the Platform
Certificates are a powerful way to reward learners and give formal recognition for their achievements. Your LMS allows you to design and assign certificates for different activities such as quizzes, course completions, or bundle completions.
1. Types of Certificates
There are three types of certificates available on the platform:
Quiz Certificates – Automatically issued when a student successfully completes a quiz.
Course Completion Certificates – Awarded upon completing an entire course.
Course Bundle Certificates – Granted after a learner finishes all courses included within a course bundle.
Each type serves a unique purpose, allowing you to maintain separate designs or templates for each event.
2. Creating a Certificate
To create a new certificate:
Log in to your Admin Panel.
Navigate to the Certificates section.
Click Add New Template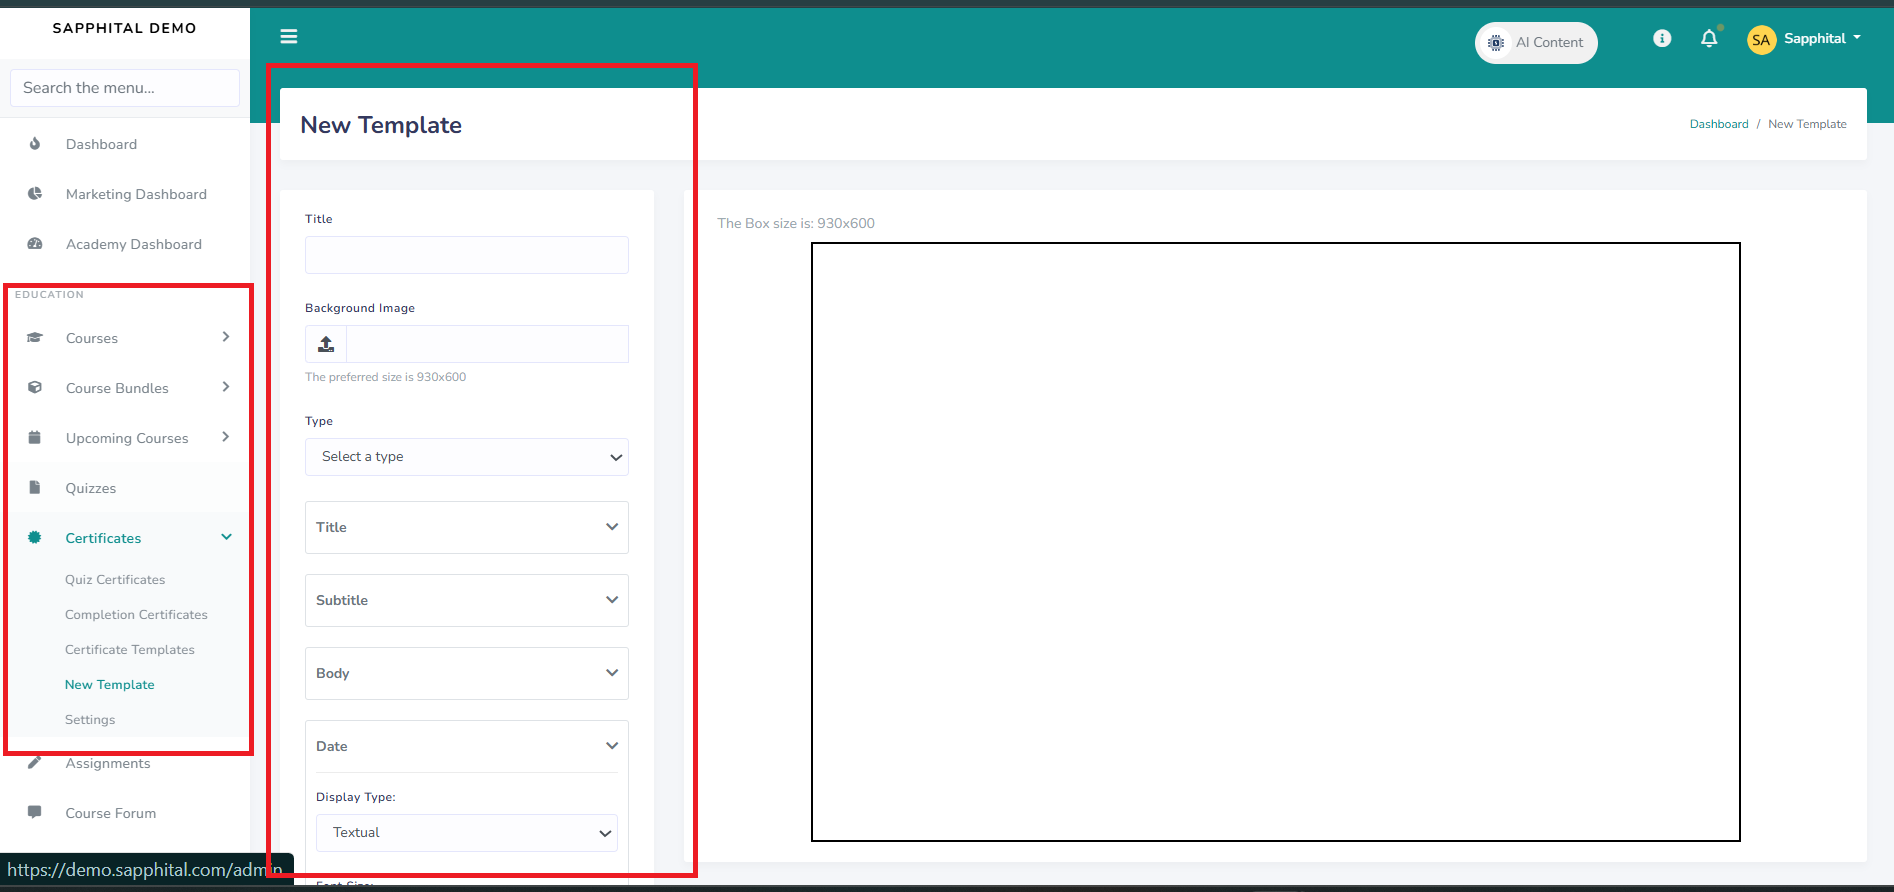
You’ll then enter key details to define how your certificate looks and behaves.
Certificate Title – The name that identifies this certificate (for example, “Course Completion Certificate”).
Background Image / Template – Upload the design that forms the base of your certificate.
For best results, use an image size of 930 × 600 pixels.
Certificate Type – Choose whether this certificate applies to a Quiz, Course Completion, or Course Bundle Completion.
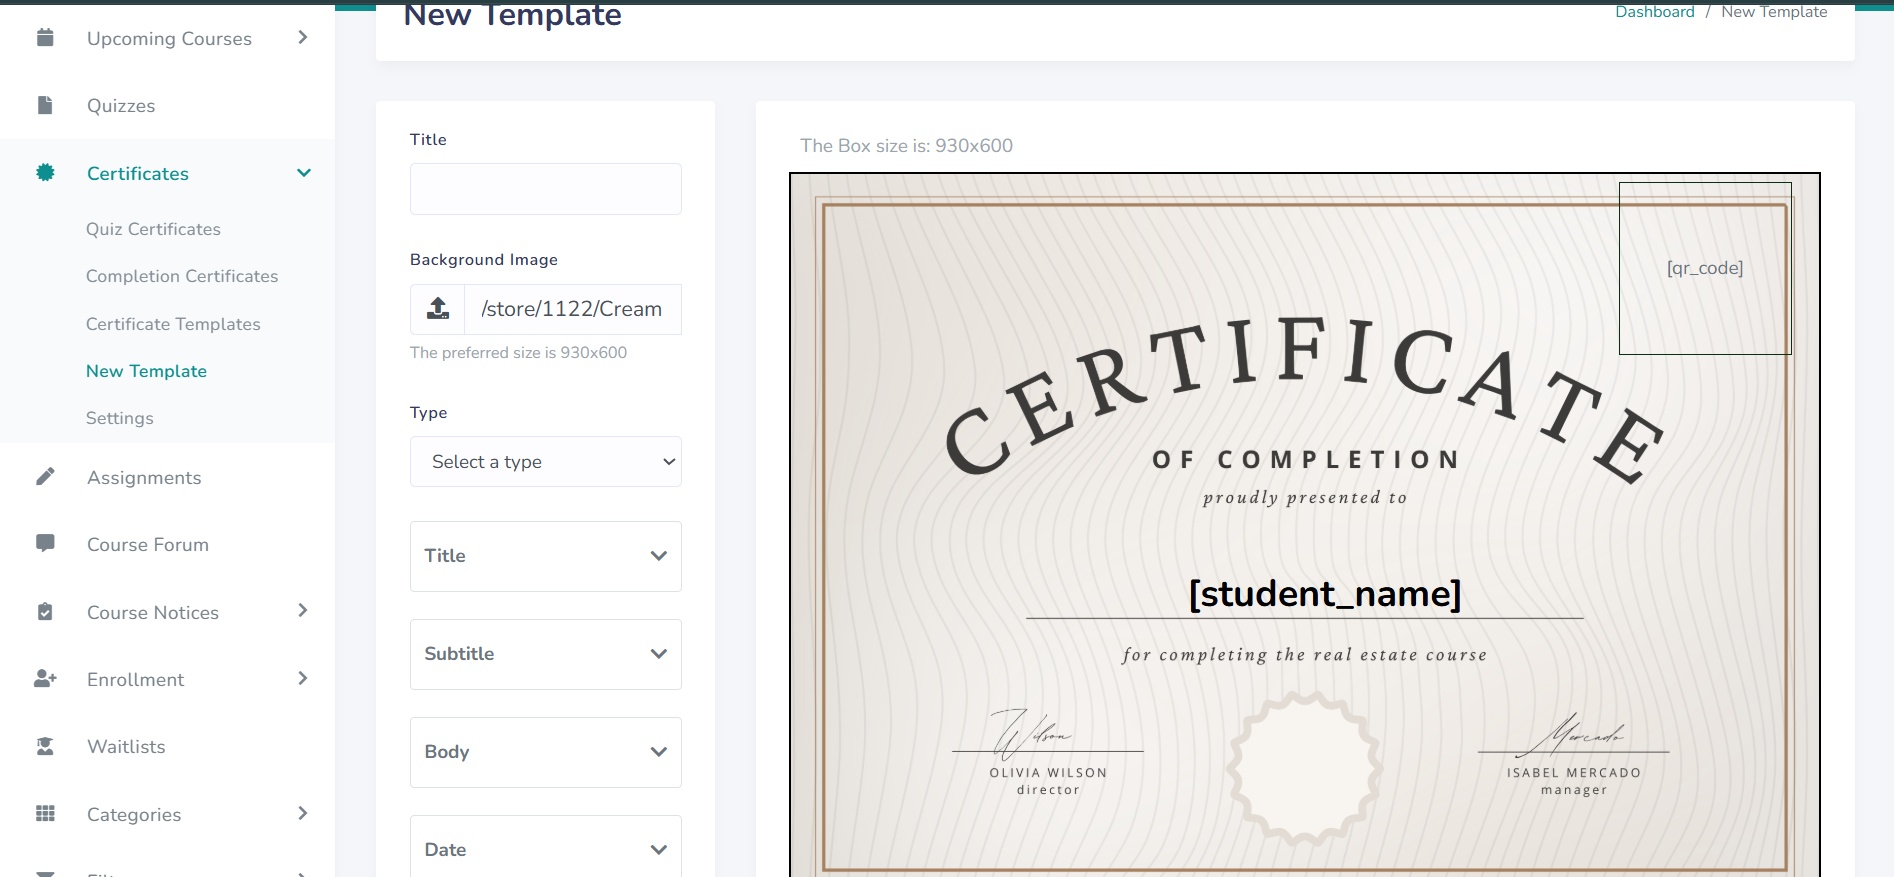
3. Customizing Certificate Fields
Once your background and type are set, you’ll see multiple text fields that can be placed and styled on top of your background. These allow you to fully personalize the certificate layout.
The available fields include:
Title – The main heading of your certificate (e.g., Certificate of Achievement).
Subtitle – A short line beneath the title describing the certificate’s purpose.
Body – The main content area containing learner or course information.
Date – Displays the issue or completion date.
QR Code – Automatically generates a QR code that can link to the learner’s verification page.
Hint – Optional small text for notes or taglines.
Student Name – Displays the learner’s name.
Instructor Name – Displays the name of the instructor for that course.
Platform Name – Shows the platform or organization name.
Course Name – Automatically fills in the name of the completed course.
Instructor Signature – An uploaded image of the instructor’s signature.
Platform Signature – A logo or signature for the institution or organization.
Stamp – A seal or stamp image to add an official finishing touch.
4. Field Formatting and Style Options
Each text or image field comes with its own set of customization controls, allowing you to fine-tune how it appears on the certificate.
Within each field, you can adjust:
Font Size – Controls the text size.
Text Color – Set a specific color using HEX values (e.g., #000000 for black).
Font Weight – Choose whether the text appears in bold or normal weight.
Text Alignment – Position the text as center, right, or left.
Active – Toggles the field’s visibility on or off.
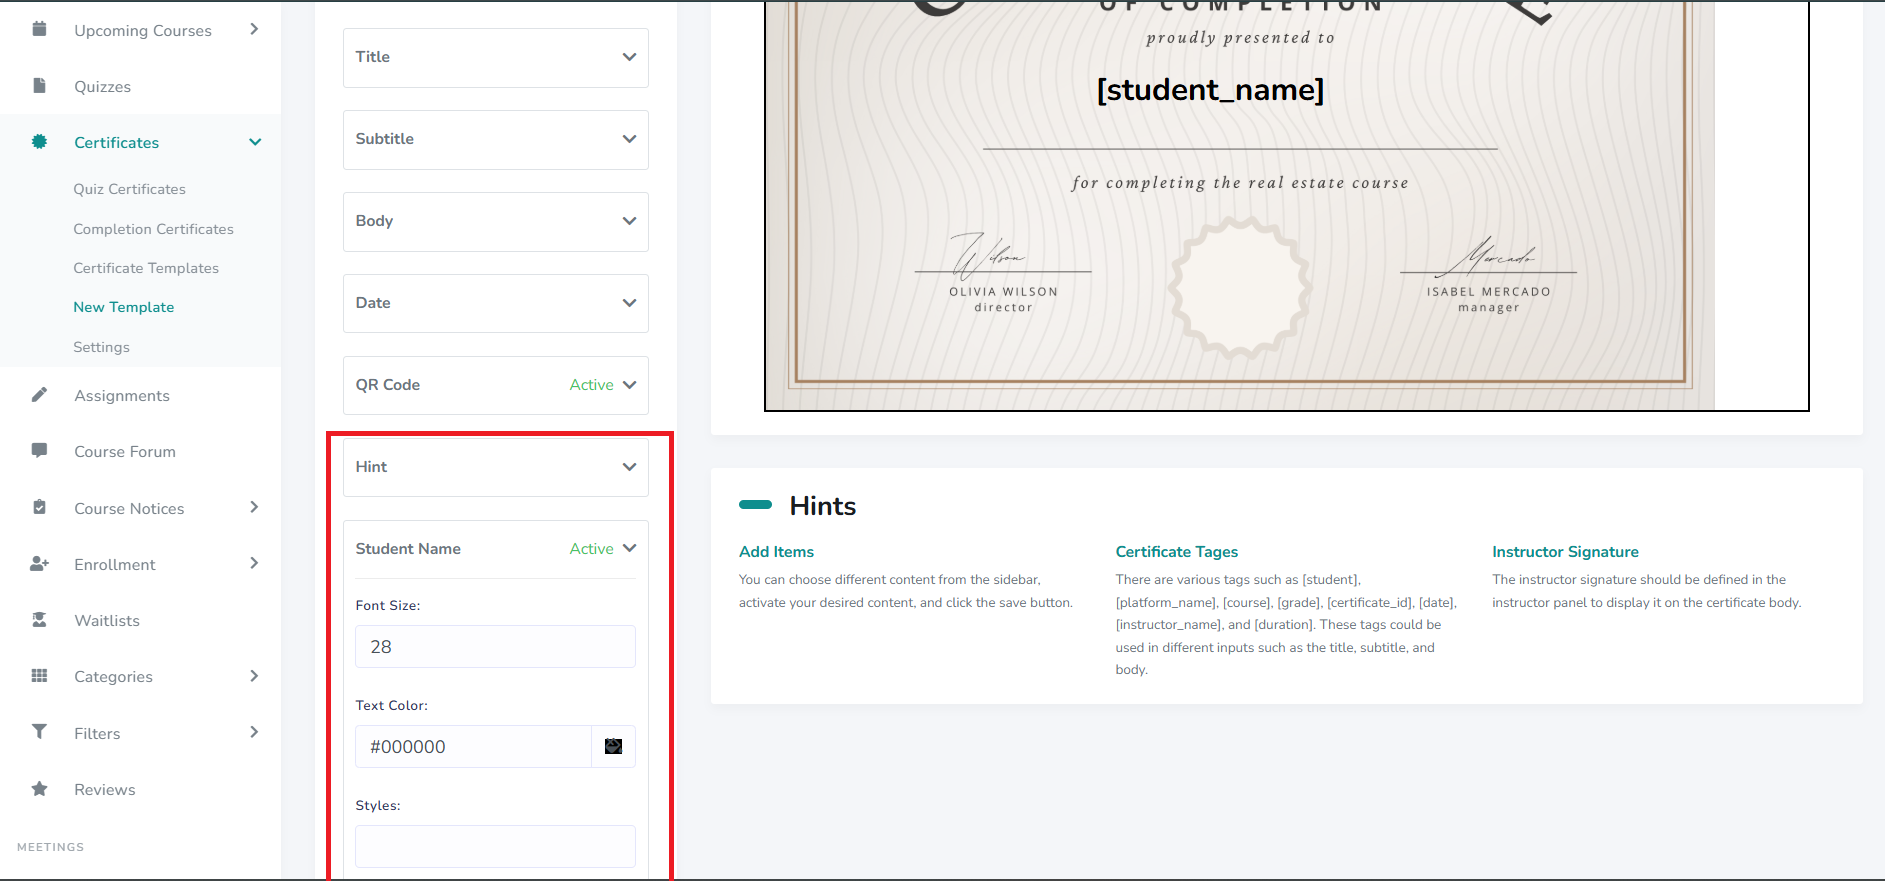
This flexibility lets you create professional, unique certificate layouts that align perfectly with your brand.
5. Saving and Generating Certificates
After customizing your fields and design, click Save to store your certificate. You can then preview it to make sure all elements are properly aligned.
Once finalized, the certificate will be automatically generated whenever the corresponding event occurs — such as a learner completing a quiz, finishing a course, or completing a full course bundle.
Comments (0)

Categories
Recent posts
Customizing Colors and Logo
5 Nov 2025.jpg)
Using the Noticeboard and Notifications
6 Nov 2025
Enrolling Learners in the LMS
6 Nov 2025.jpg)